sentry-native库是sentry.io公司推出崩溃调试SDK库。本文记录在windows上编译sentry-native库的过程,并实现静态/动态/x86/x64/Debug/Release/RelWithDebInfo多模式编译。
如果不想自己编译,也可以借助vcpkg导入sentry-native库实现全自动编译。编译完成后去vcpkg的库文件夹里把crashpad_handler.exe复制到项目程序目录就可以了。
编译
首先去sentry-native库的release发布页面下载最新版本的sentry-native.zip。直接克隆库也可以(克隆后需执行git submodule update --init --recursive命令同步子模块)。
下载好库以后,在库目录里新建批处理文件(保存为UTF8编码)
@echo off
chcp 65001 > nul
setlocal enabledelayedexpansion
echo author: https://wkings.blog/archives/1721
rem SENTRY_BUILD_RUNTIMESTATIC 是否链接MSVC静态运行时 ON=链接静态运行时 OFF=链接动态运行时
set SENTRY_BUILD_RUNTIMESTATIC=OFF

@REM i=platform, j=configuration
for %%i in (Win32 x64) do (
    for %%j in (Debug Release RelWithDebInfo) do (
        rem k=BUILD_SHARED_LIBS ON=构建动态库 OFF=构建静态库
        for %%k in (ON OFF) do (
            if %%k==ON (set LIBS=Dynamic) else (set LIBS=Static)
            echo ===========================================================
            echo 平台=%%i 模式=%%j 动态链接库=%%k MSVC静态链接库=%SENTRY_BUILD_RUNTIMESTATIC% 构建目录=build/%%i_%%j_!LIBS!
            echo 配置项目
            cmake -B build/%%i_%%j_!LIBS! -A %%i -D BUILD_SHARED_LIBS=%%k -D SENTRY_BUILD_RUNTIMESTATIC=%SENTRY_BUILD_RUNTIMESTATIC% > nul
            echo 构建项目
            cmake --build build/%%i_%%j_!LIBS! --clean-first --parallel --config %%j > nul
            cmake --install build/%%i_%%j_!LIBS! --prefix install/%%i_%%j_!LIBS! --config %%j > nul
        )
    )
)
下载好库以后,在库目录里新建powershell7脚本文件:
1 2 3 4 5 6 7 8 9 10 11 12 13 14 15 16 17 18 19 20 21 22 23 24 25 26 27 28 29 30 31 32 33 34 35 36 37 38 39 40 41 42 43 44 | # 自定义部分开始 $SENTRY_BUILD_RUNTIMESTATIC = "ON" # sentry是否链接MSVC静态运行时 "ON"=链接MSVC静态运行时 "OFF"=链接MSVC动态运行时 $buildRoot = ".\build" # 构建配置目录 $installRoot = ".\install" # 构建生成目录 # 自定义部分结束 $var_platform = @("Win32", "x64") $var_config = @("Debug", "Release", "RelWithDebInfo") try { foreach ($platform in $var_platform) { foreach ($config in $var_config) { foreach ($shared_lib in ("Dynamic", "Static")) { $buildDir = Join-Path -Path $buildRoot -ChildPath $platform, $config, $shared_lib $installDir = Join-Path -Path $installRoot -ChildPath $platform, $config, $shared_lib Write-Host "========================================" -ForegroundColor Yellow Write-Host " 平台=$platform 模式=$config 构建类型=$shared_lib 链接MSVC静态运行时=$SENTRY_BUILD_RUNTIMESTATIC 构建目录=$buildDir" -ForegroundColor Yellow # 1. 配置阶段 (Configure) Write-Host ">> 正在配置..." -ForegroundColor DarkYellow if ($shared_lib -eq "Dynamic") { cmake -B $buildDir -A $platform -D BUILD_SHARED_LIBS=ON -D SENTRY_BUILD_RUNTIMESTATIC=$SENTRY_BUILD_RUNTIMESTATIC > nul } else { cmake -B $buildDir -A $platform -D BUILD_SHARED_LIBS=OFF -D SENTRY_BUILD_RUNTIMESTATIC=$SENTRY_BUILD_RUNTIMESTATIC > nul } # 检查 cmake 命令的退出码 if ($LASTEXITCODE -ne 0) { throw "CMake 配置失败,退出码: $LASTEXITCODE" } # 2. 构建阶段 (Build) Write-Host ">> 正在编译..." -ForegroundColor DarkYellow cmake --build $buildDir --clean-first --parallel --config $config > nul cmake --install $buildDir --prefix $installDir --config $config > nul if ($LASTEXITCODE -ne 0) { throw "CMake 编译失败,退出码: $LASTEXITCODE" } } } } } catch { Write-Error "构建时发生错误: $_" } |
然后打开带有可执行cmake命令的命令行,切换到库所在目录,执行刚刚创建的批处理文件即可。
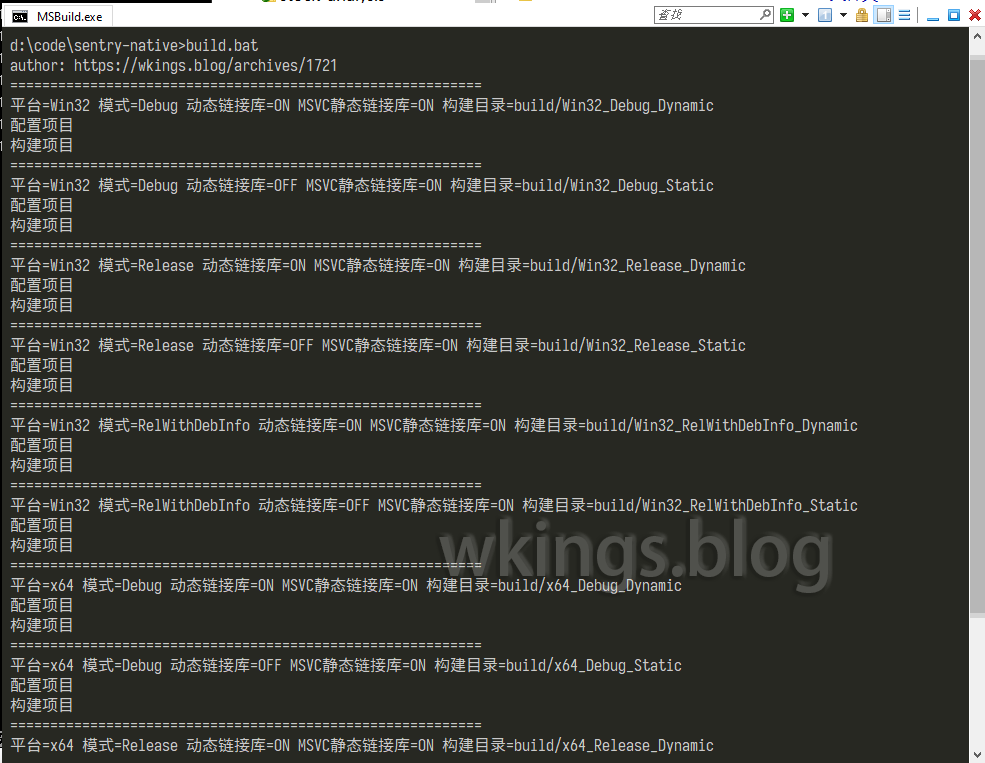
批处理执行完成后,会在库目录里新建build和install目录。build是构建配置目录,可以不管它。install目录是生成的要集成到你项目里的sentry SDK文件。
集成到自己的项目
本文参考官方文档。
集成代码很简单,从install目录里选择你需要集成的对应版本即可。只需包含sentry.h文件、链接lib目录中的库文件、再把bin目录中的crashpad_handler.exe复制到你的程序目录就可以了。
1 2 3 4 5 6 7 8 9 10 11 12 13 14 15 16 17 18 19 20 21 22 | #include <sentry.h> // windows平台上,需要链接sentry所需的库 #pragma comment(lib, "Version.lib") #pragma comment(lib, "Winhttp.lib") #pragma comment(lib, "Dbghelp.lib") int main(void) { sentry_options_t *options = sentry_options_new(); sentry_options_set_dsn(options, "https://524ce90a723cd308a13bb304864cf4bd@o4510951641317376.ingest.us.sentry.io/4511054406090752"); // This is also the default-path. For further information and recommendations: // https://docs.sentry.io/platforms/native/configuration/options/#database-path sentry_options_set_database_path(options, ".sentry-native"); sentry_options_set_release(options, "my-project-name@2.3.12"); sentry_options_set_debug(options, 1); sentry_init(options); /* ... */ // make sure everything flushes sentry_close(); } |

文章评论