官网教程是在linux环境下构建x64动态库,由于自己需要crashpad x86 static静态库,所以这篇文章记录一下如何在windows系统上构建crashpad x86/x64的static静态库。
官网教程构建时遇到的问题
官网教程是在linux环境下构建x64动态库,还需要安装什么depot_tools工具,windows下彻底没办法,linux虚拟机环境尝试了半天也没构建成功,具体遇到的问题如下:
以root用户运行fetch crashpad命令,提示Running depot tools as root is sad.。行吧,那换个普通权限用户。
换普通权限用户,在执行ninja -C out/Default命令步骤时,提示未找到zlib.h
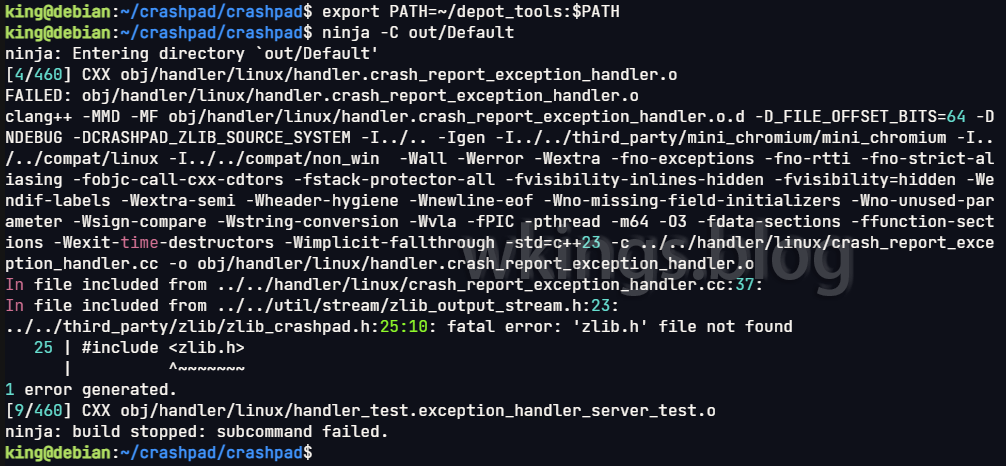
为什么就不能一次性把文件提供完整呢?放弃!
在windows平台下构建
基本完全参考按照此教程。
下载源代码
从github上找到了这个库:https://github.com/backtrace-labs/crashpad,这是Backtrace公司修改后的crashpad库,增加了support for native Mac OS on M1 ARM builds功能,以及最重要的可以用CMake直接构建crashpad的功能。另外此库也提供编译好的x64静态库。
首先clone该库,初始化获取全部模块:
# Clone the repository
git clone https://github.com/backtrace-labs/crashpad.git

cd crashpad

# use the backtrace branch:
git checkout backtrace

# initialize submodules
git submodule update --init --recursive
构建
先要确保当前命令行环境可以使用cmake命令(直接输入命令cmake,看执行结果,如果没有cmake命令,则开始菜单里找“Developer Command Prompt for VS”项,通过此项就可以运行VS自带的cmake命令)。
然后如果需要构建动态库,不需要修改文件,直接执行下面的构建命令。如果是需要静态库,则需要修改CMakeLists.txt文件。打开CMakeLists.txt文件,修改内容如下:
cmake_minimum_required(VERSION 3.15)  # <-- 改为3.15
project(backtrace_crashpad LANGUAGES C CXX)
cmake_policy(SET CMP0077 NEW)

# 在此处插入下面的内容。MT为生成静态库,MD为动态库。两者二选一
# /MT
set(CMAKE_MSVC_RUNTIME_LIBRARY "MultiThreaded$<$<CONFIG:Debug>:Debug>")

# /MD
# set(CMAKE_MSVC_RUNTIME_LIBRARY "MultiThreaded$<$<CONFIG:Debug>:Debug>DLL")
下面是构建命令,分别生成x86和x84,debug和release模式的程序。另外还有release带pdb文件模式,config参数替换为--config RelWithDebInfo即可。
# 在cbuild_x86目录生成x86构建文件
cmake -B cbuild_x86 -A Win32
# 在cbuild_x64目录生成x64构建文件
cmake -B cbuild_x64 -A x64
# 在cbuild_x86目录构建debug模式程序
cmake --build cbuild_x86 --clean-first --config Debug
# 在cbuild_x86目录构建release模式程序
cmake --build cbuild_x86 --clean-first --config Release
# 在cbuild_x64目录构建debug模式程序
cmake --build cbuild_x64 --clean-first --config Debug
# 在cbuild_x64目录构建release模式程序
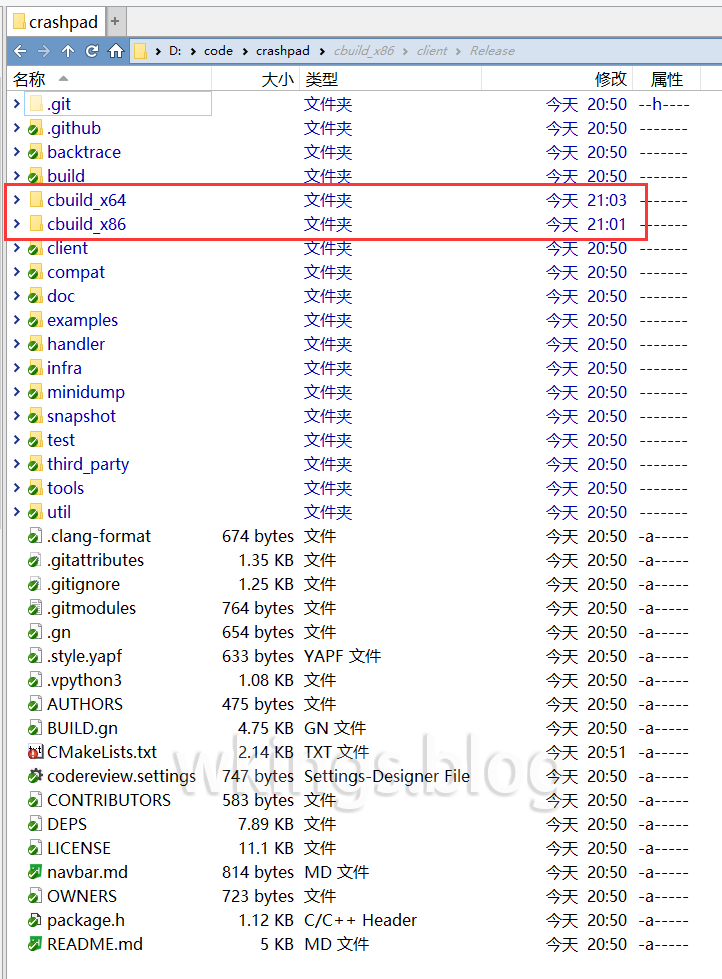
cmake --build cbuild_x64 --clean-first --config Release现在,应该生成好两个目录了。
嵌入到项目
为方便叙述,下文统一指代crashpad目录为$(CrashpadRoot)。比如我crashpad目录是在D:\code\crashpad,那么此时$(CrashpadRoot) = D:\code\crashpad。
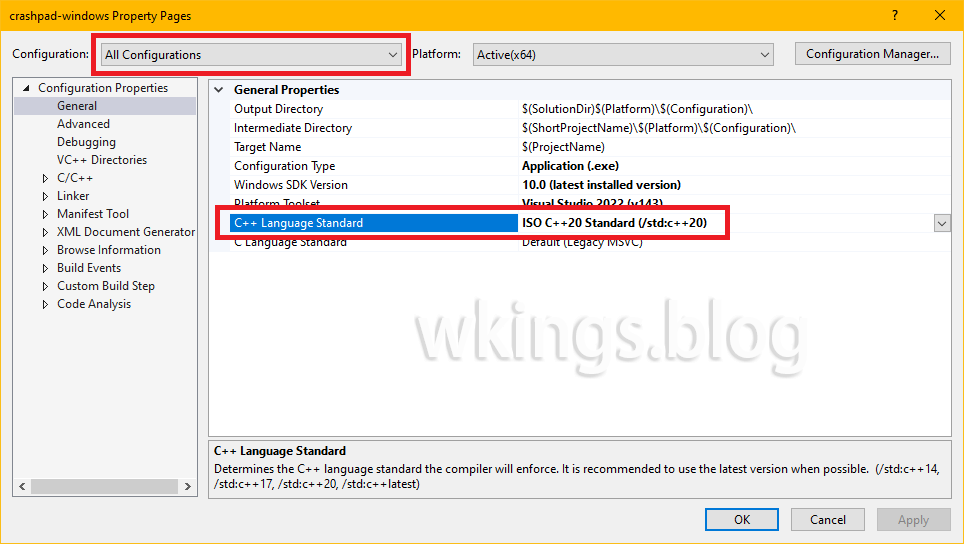
C++ 标准
crashpad需要C++ 20标准。VS修改如图:
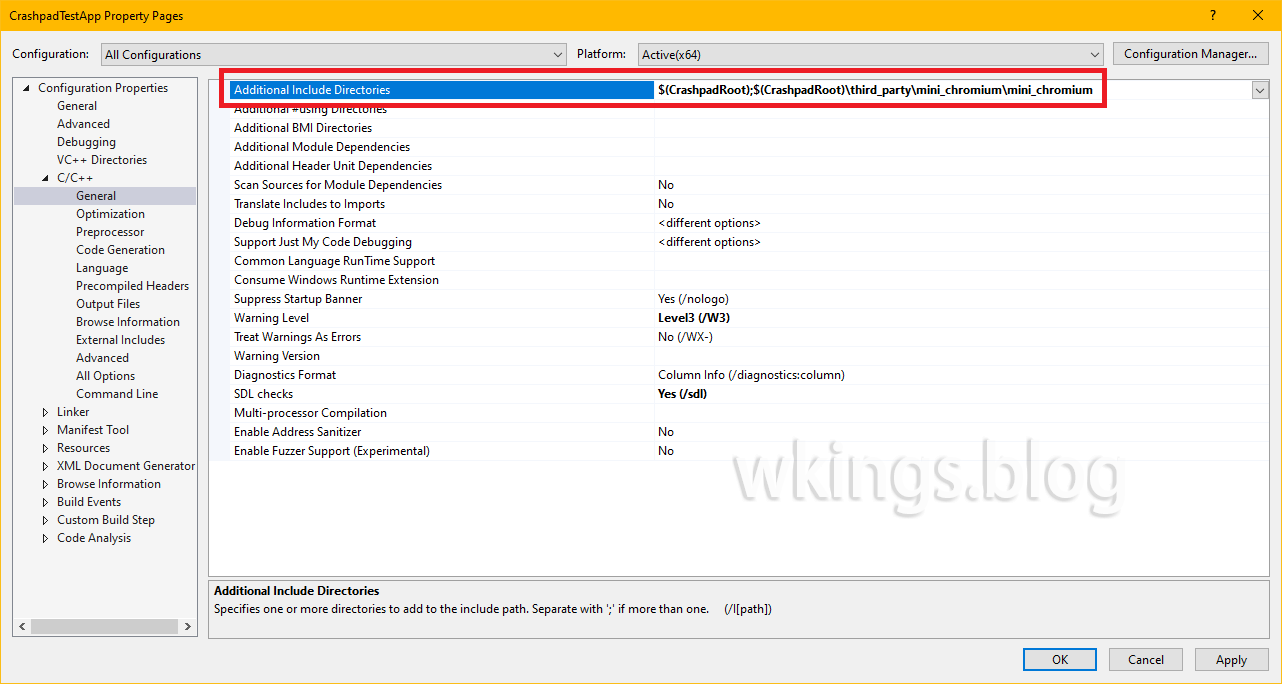
设置附加包含目录
添加附加包含目录,让VS可以载入crashpad头文件。
VS的项目属性 -> C/C++ -> 常规 -> 附加包含目录 选项,增加:
$(CrashpadRoot)$(CrashpadRoot)\third_party\mini_chromium\mini_chromium
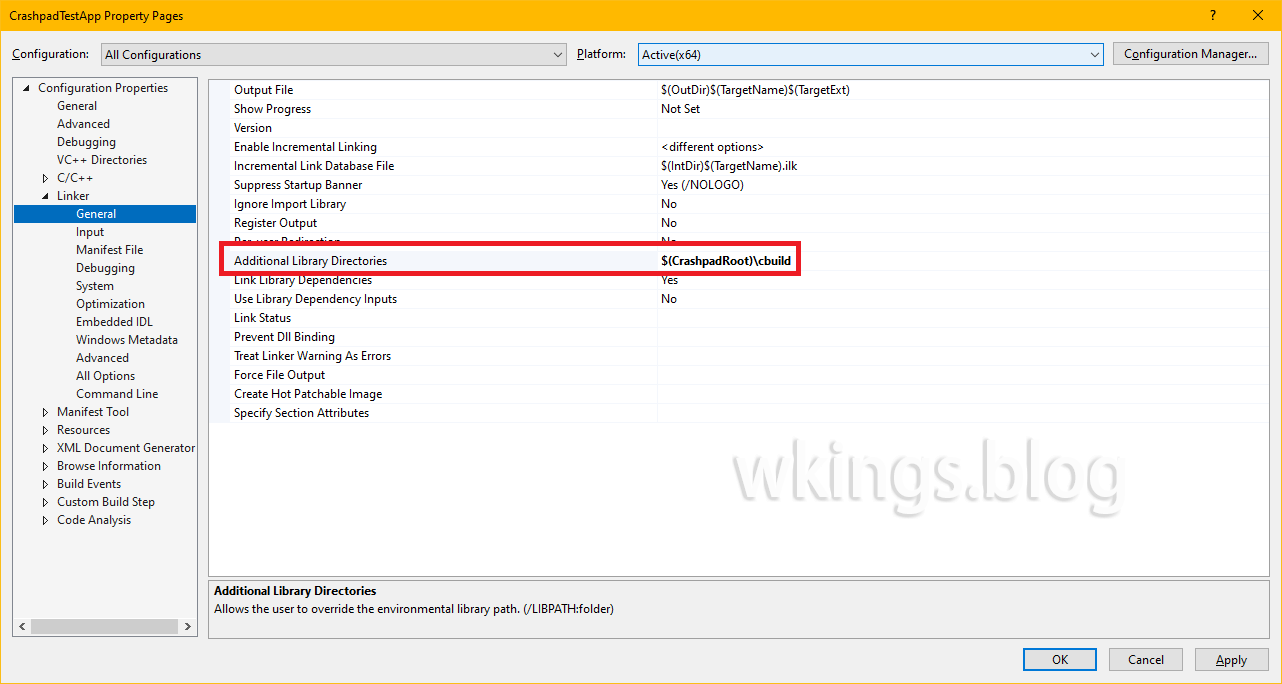
设置附加库目录
添加附加库目录,让VS可以读取crashpad的链接库文件。注意需要在VS的x86和x64平台分别添加不同的目录。
VS的项目属性 -> 链接器 -> 常规 -> 附加库目录 选项,按平台增加$(CrashpadRoot)\cbuild_x86或$(CrashpadRoot)\cbuild_x64。
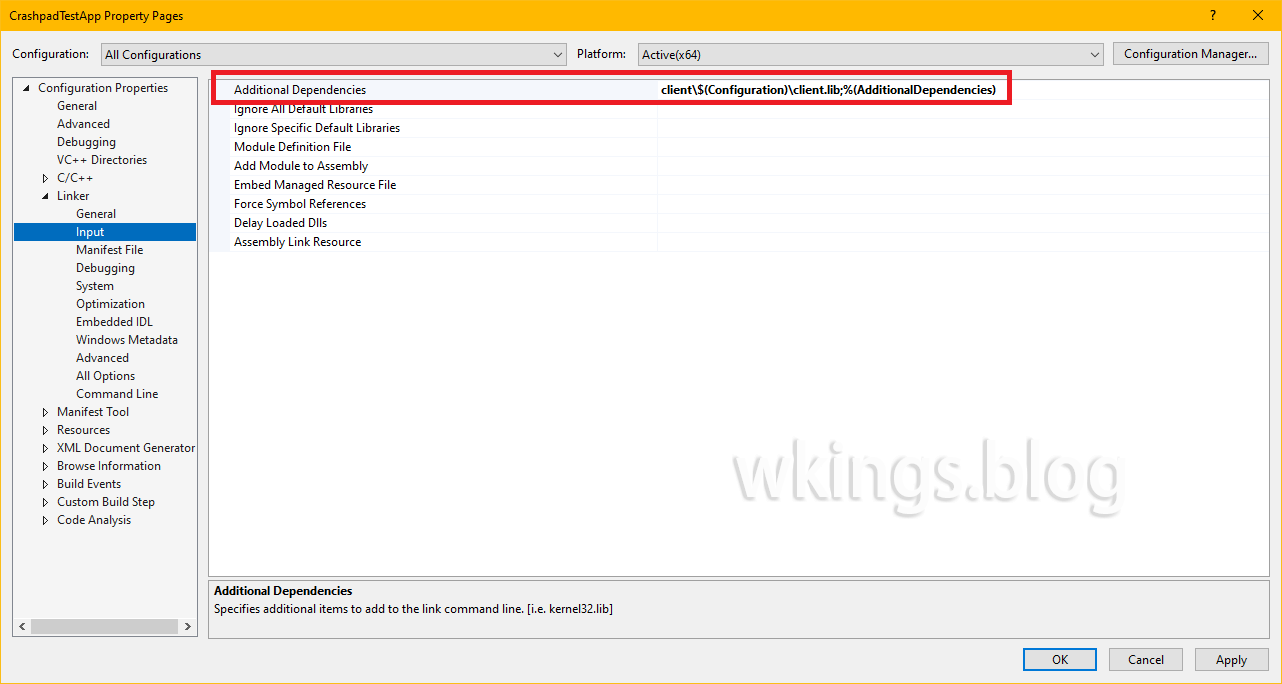
设置附加依赖项
添加附加依赖项,让VS可以载入crashpad的链接库文件。
x86和x64平台可以设置为一样的内容,因为上一步分别设置了不同的根目录,且每个目录中client路径是一样的。
debug和release模式也可以设置为一样的内容,因为路径中有VS变量,VS可以自动切换路径。
VS的项目属性 -> 链接器 -> 输入 -> 附加依赖项 选项,增加client\$(Configuration)\client.lib。
项目代码示例
头文件, bt_crashpad.h
#pragma once

namespace backtrace {
	bool startCrashHandler();
}源文件,bt_crashpad.cpp
#include "bt_crashpad.h"

#include <algorithm>
#include <map>
#include <memory>
#include <string>
#include <vector>


#define NOMINMAX  // prevent Windows headers from defining min/max
#include <client/crash_report_database.h>
#include <client/settings.h>
#include <client/crashpad_client.h>
#include <client/crashpad_info.h>


/*
 * ENSURE THIS VALUE IS CORRECT.
 *
 * This is the directory used to store and queue crash data for the application.
 */
static const wchar_t CRASHPAD_DATABASE_PATH[] = L".";


/*
 * ENSURE THIS VALUE IS CORRECT.
 *
 * Crashpad has the ability to support crashes both in-process and out-of-process.
 * The out-of-process handler is significantly more robust than traditional in-process
 * crash handlers. This path may be relative. Point to the installed Crashpad handler
 * built from the Backtrace Crashpad source.
 */
static const wchar_t CRASHPAD_HANDLER_PATH[] = L".\\handler.exe";


/*
 * YOU MUST CHANGE THIS VALUE.
 *
 * Replace "youruniverse" with the Backtrace universe name and replace the submission token.
 */
static const char BACKTRACE_SUBMIT_URL[] = "https://submit.backtrace.io/youruniverse/000000000000000000000000000000000000000000000000000000000000000/minidump";


namespace backtrace {


static std::unique_ptr<crashpad::CrashReportDatabase> database;


bool startCrashHandler()
{
    using namespace crashpad;


    std::map<std::string, std::string> annotations;
    std::vector<std::string> arguments = { "--no-rate-limit" };


    /*
     * THE FOLLOWING ANNOTATIONS MUST BE SET.
     *
     * Backtrace supports many file formats. Set format to minidump
     * so it knows how to process the incoming dump.
     */
    annotations["format"] = "minidump";


    base::FilePath db(CRASHPAD_DATABASE_PATH);
    base::FilePath handler(CRASHPAD_HANDLER_PATH);


    database = crashpad::CrashReportDatabase::Initialize(db);


    if (database == nullptr || database->GetSettings() == NULL)
        return false;


    /* Enable automated uploads. */
    database->GetSettings()->SetUploadsEnabled(true);


    return CrashpadClient{}.StartHandler(
        handler, db, db, BACKTRACE_SUBMIT_URL, annotations, arguments, false, false, {}
    );
}

}
在你的代码中插入
#include “bt_crashpad.h”

{
   …
   if (backtrace::startCrashHandler() == false)
   {
       // crashpad failed to start
   }
   …
}最后根据你自己项目的平台,复制$(CrashpadRoot)\cbuild_(x86|x64)\handler\(debug|release)的handler.exe或handler_console.exe到你的项目目录。VS里F5启动时,handler.exe应复制到代码所在目录。单独运行或分发项目程序时,handler.exe应复制到程序所在目录。或者你手动指定上面代码中的路径为绝对路径也可以。

文章评论